Thursday, September 29, 2011

It's Wednesday

I've been very busy and cranking out crumb blocks like nobody's business. More on those later.

WIP update:
  • Challenge pillow: have machine quilted the front and the back. I've been dragging my feet on doing the side pieces but it is my goal for the weekend. See it here.

  • Green half-square triangles: cut and pieced enough squares for 10 more blocks (yes, that's 720 triangles). Repetitive, yes, but am looking forward to the results.

  • Crumb along: I started a crumb quilt and am following along with Jo. So far we've done flying geese, hearts, stars, and 4 and 9-patches. So far I have 30 6" blocks. More below...

Here are all of my crumb blocks so far. I just love making them - no thinking, just grabbing whatever takes my fancy.


I struggled with my hearts at first, but they are growing on me and getting better. This week's 4 or 9-patches are not as fun as the stars, but I managed to put together some - only a few little 9-patches, but there will be more to come.

Here's a taste of some new ones.


I also spent some time on October's Block Lotto sneak preview. I'm not allowed to share anything about them until the first of the month. The colors (blue, cream, and a touch of brown) were selected by vote so that's not a surprise to anyone. What could they be this month? I realised that I have lots of soft chalky blues which is one of my favourite colors - so much so that besides beige and brown it's the only other color I have in my living room and family room.

Coincidentally, my mom sent me some fabric this week - it's blue and cream and brown. Completely unrelated to the Block Lotto colors, but definitely because of my home decor. Apparently, she bought them a while ago (maybe to make something for me?) Now they are mine so I had to go shopping and find some others to work with. I'll post them when I start to work on that project - but must finish a few things before then.

Thursday, September 22, 2011

Addicted to crumbs

I spent most of my day playing with my crumb blocks. I love the spontenaity and couldn't wait to get back to them after dinner last night. Here's most of the blocks that I have finished (3 didn't fit in the photo).


As fun and free as these blocks are, I admit that some of them are not very appealing. I like to 'plan' the blocks a little bit so that I don't end up with a muddle of prints. I also found that I can't pick up any old triangle and square - there are some proportions that work and some that don't.

This star is a favorite one. The colors work together but it's still scrappy.


This tiny star is also a favorite. I don't think I can go much smaller.


My heart attepts were not great - I will have to try a few more. Here's the best of them.


Overall, lots of fun. Can't wait to put together a few more.

Wednesday, September 14, 2011

First crumb blocks

Woke up at 6am this morning and decided to work on my crumb blocks for the Crumb Along. Had a late night at work last night and am away for the weekend so this was my only chance. This is what I managed to piece together in about 1-1/2 hours.


I admit that my pile of scraps is not extensive and most are bigger than your usual crumbs; however, it does give me a bit more flexibility. Jo's blocks all have reds as a key color to tie all of the blocks together. I seem to have a lot of black and pink scraps so I will be sure to include a little of each in every block to help tie them together. DH has a few dark gray shirts lefteover from his now-defunct corporate life - they will make good sashings.


These flying geese were made from corners I cut off of August's Block Lotto blocks.


I also have many 1-1/2 inch wide pieces from my one-patch quilt's unfortunate sashing adventures! These should help tie the blocks in together too.


I am really looking forward to some super-scrappy crumb blocks. I promise to keep all of my crumbs from now on!

Sunday, September 11, 2011

Crumb along

I'm joining in with Jo's Country Junction and the Crumb Along. I don't have a lot of crumbs, but I'll give it a go and see where it leads. As if I didn't have enough to do...

Quilting on challenge cushion


I found the time to quilt the front and back of my challenge cushion this weekend. I'm pleased with the results and realise how effortless it is to FMQ on something small. Imagine my smiles when I did not have to get up and refold all of the edges and heave 1/2 of a bed-sized quilt over my shoulder for each section of quilting. Ah, bliss...


I think that the quilting from the back looks great too.

Thursday, September 8, 2011

Update on projects

I've just posted a long description of my one-patch quilt that I finished on the weekend. Check it out if you are interested.


WIP:
  • One-patch: DONE!!
  • Distraction: a Gryffindor tie from red satin and gold ribbon - DD is attending a Harry Potter themed birthday party on the weekend - pleased with the results.
  • Block Lotto: made 9 of September's block (see below)
  • Green/blue challenge pillow: no progress except for purchasing some variegated thread to start FMQ. Still pondering the quiting design
  • Green HST: no progress.
  • Blue snowflake: no progress.

I made 9 of this month's blocks for Block Lotto. I only managed a pic for 6 of them so far. I'm not a huge batik fan and I thought mine were particularly psychedelic, but as I've seen the posts of others they are starting to grow on me. Surprisingly, this is often the way on Block Lotto.

Monday, September 5, 2011

One-patch finished!


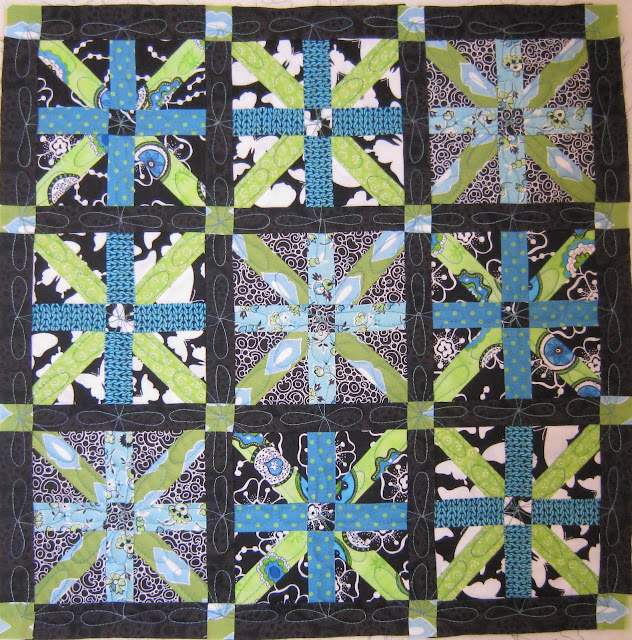
I can't believe that I managed to finish this quilt on the weekend. When I made the decision last week I regretted it immediately. Surprisingly, I accomplished a lot this weekend (besides finishing the quilt) so I guess there wasn't as much to do as I thought.

I have never been know for my brevity when it comes to writing. I send long emails and receive one-word responses. But, I am compelled to tell the 'story' of this quilt from start to finish - every project is full of lessons learned both good and bad. Read the bold text for the executive summary.

A quilt started in a class


Up until a few months ago I never took a quilting class. There's a reason for this - I believe my own creativity is more important than learning another person's methods. However, my mother and I attended the Remarkables Symposium in Queenstown and I thought doing some classes together would be fun. I was right. But, I felt restricted by the fabric requirements, etc.

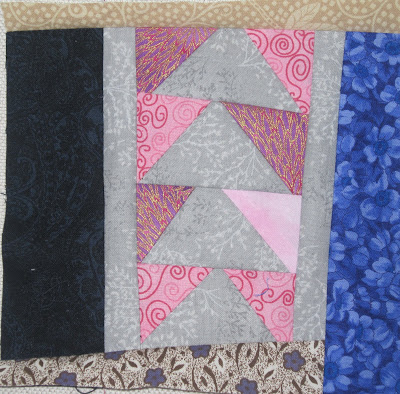
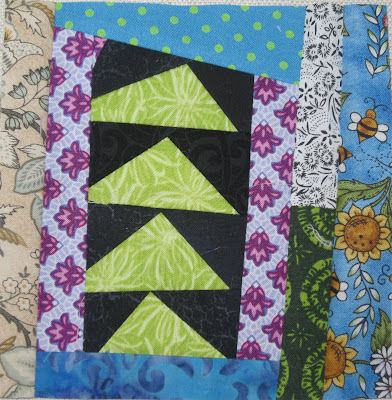
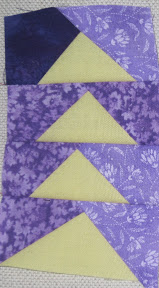
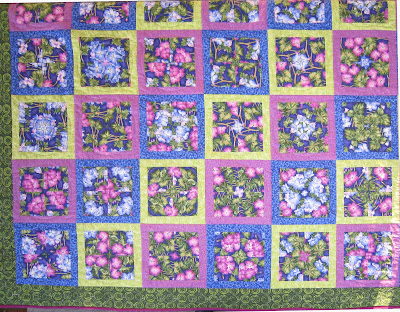
The choice of feature fabric was tricky. I had to find something with a 12-inch repeat that had enough contrast so that the blocks were effective. When I got to class I was surprised at some of the choices that others had made - I didn't think that they would work - but, I was wrong. Every fabric produced interesting designs.

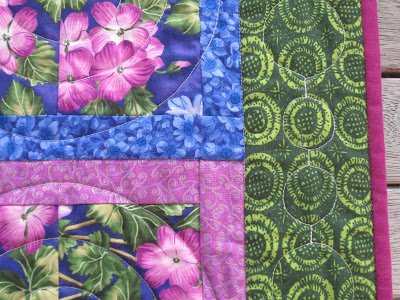
The feature fabric and the sashing that I chose created a vivid quilt, but too vivid for my tastes. If I had stuck to blues/purples for the sashing, it would have been more subtle, but they were surprisingly difficult to match. I admit that it is good to push myself out of my comfort zone.

Verdict: A great class but compromised on my choice of fabric to create the pattern.

Wanted to make it bigger


I have a thing about making quilts that are big enough for a bed. The material requirements for the class were for a lap-sized quilt so I had to scramble during the 2 days of class to make enough blocks. I made twice as many as some other people and this put me behind. It wasn't a big problem until I started making mistakes (see below).

Verdict: Lap quilts are okay.

Did not have enough sashing fabric

The increased number of blocks and not one but two (or three) mistakes cutting the sashing meant that I needed to add a third sashing fabric in addition to the lime green and blue that I originally planned. Off to the symposium marketplace to find something else - the bright fuchsia pink. Which I cut wrong again! If I was at home I would have walked away from this project and come back in a few days (or weeks...or months).

Verdict: Measure twice cut once, not the other way around.
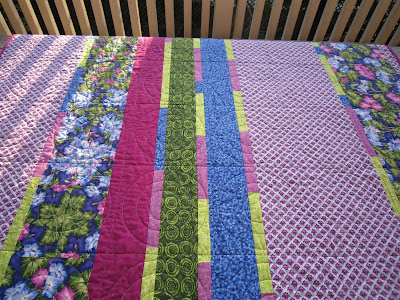
Additional fabrics & a pieced backing


After paying 'top dollar' for the fabric on the front of the quilt and having very little left I went off to my mainstream fabric store to find some bargains for a border and the backing. In NZ we have lovely quilt shops with expensive fabric and mainstream ones with a modest selection of less-expensive ones. I try to support my LQS, but sometimes the prices are painful.

I found some good buys that matched, but not quite enough. So, it was time to make the best of what I had and do a pieced back. I know a lot of people do a pieced back as a design statement, but I only do it out of necessity. I really had to piece this back and I used every little scrap I could find including all of the sashing strips that I cut wrong (yes, there were a lot of them).

I think I took as much time piecing the back as I did on the front. I think it came out well, but was a lot of trouble. Still, quilting has come from a 'make do' philosophy and I do try to adhere to this when I can.

Verdict: A pieced back can be fun but not when you have to.
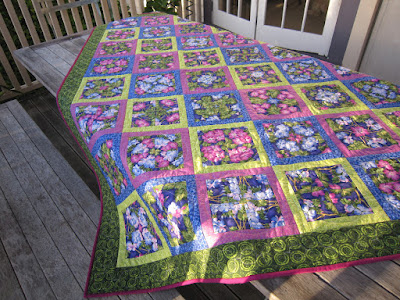
Sandwiching

My pieced back was just big enough. So, I was extra careful when sandwiching the layers to keep them square. Even so, one edge was mismatched. I only discovered this after basting them together. This has happened to me on all but one of the quilts I've finished (5 so far). A mistake I keep making; however, I'm quick to carry on and patch a strip on the back - works a treat.

Verdict: Make the back big enough to accommodate for a bit of skew when basting.

Quilting


I always struggle with choosing a pattern for machine quilting. I have to balance what works with the quilt design and the limitations of my skill and FMQ on a domestic machine set up in a corner of my bedroom. I'm also mindful of how much work it will take to complete. My tendency is to choose something that follows the piecing; I've never done an all over pattern (I must try that sometime).

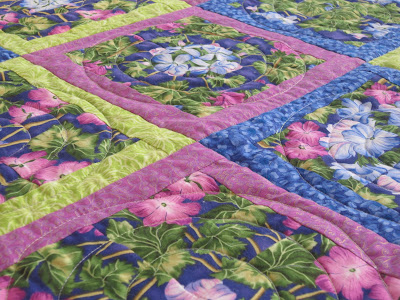
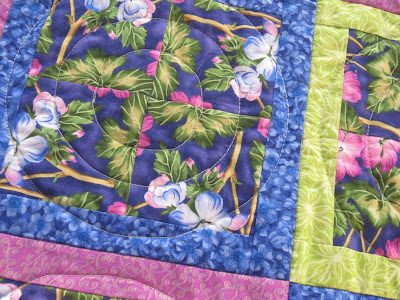
This time I took my cue from the circle motif on the border and created a bulls eye on each block. I think this could have been very effective, but I skimped. I should have done more circles but they were troublesome both marking and sewing. A spiral would have been easier than the concentric circles that I did.

If I was willing, I'd do some filler between some of the circles. To be honest, the quilting had already dragged on, so I decided to quit when I had the chance.

Verdict: A less structured but denser design would have been easier and more effective.


Conclusions

I may sound negative about this quilt, but I'm not. I've learned a lot as I always do when I finish a project - there's nothing to learn on the things that I do well. It's hard to know exactly how things will turn out, especially with those mishaps that happen along the way. If I make a quilt that is perfect and I have nothing left to learn, I will quit.